PRODUCT REVIEW
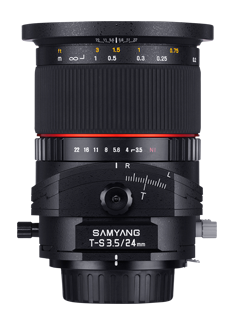
TILT/SHIFT LENS 24mm F3.5 ED AS UMC
The SAMYANG Tilt/Shift 24mm F3.5 ED AS UMC in test

In this review I would like to introduce you to a special lens that helps especially architectural photographers to work effectively
and cleanly with its special functions and at the same time still allows a lot of creativity in the experimental way of photography.
This "Klopper" inspires! The SAMYANG Tilt/Shift 24mm F3.5 ED AS UMC with its 700g weight is not necessarily a lightweight,
but this also speaks for its functions. What weighs more, can usually do more.
To get you started, I will gladly provide you with a short description of what the Tilt/Shift lens is all about, what advantages
it can bring you in various photographic situations and what special features it makes the life of many photographers much easier.

The Tilt/Shift Lens
Many photographers have heard of this special lens,
but nevertheless it is surprisingly rare to find it in
camera equipment.
On the one hand, this might be due to the complex
application steps that force the photographer
to deal intensively with the planned photo.
Another reason could be the higher purchase price compared to other lenses in combination
with the rather limited application possibilities,
which makes many photographers quickly fall back on conventional lenses.
On closer inspection, this type of lens is a sensible way to avoid unnecessary postprocessing.
At the same time, it is a decisive factor in maintaining image quality.
The name Tilt/Shift stands for the functions of tilt to shift the plane of focus and shift,
which changes the lens system in relation to the sensor plane to avoid collapsing lines within the image section.


The shift function
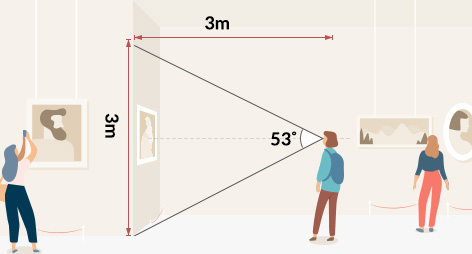
From a professional point of view, the tilt/shift lens is mainly used in architectural photography, since in this photographic field,
in addition to high imaging performance for the optimal display of the smallest details,
photos without perspective errors must be taken to provide flawless image quality.
Unwanted distortions, i.e. falling lines caused by tilting and inclining the camera,
usually have to be corrected by specific post-processing,
which eats up most of the time and can also have a negative effect on the quality of the end product if there is an increased need for correction.
If you want to photograph a building from the ground, depending on the size and distance to the subject,
you are forced to tilt the camera upwards, which leads to the problem that vertical lines that are actually parallel to each other run towards
a vanishing point and optically fall backwards. Hence the term "falling lines".
The more the camera is tilted, the more this image error affects the existing verticals.
This unwanted falling can only be avoided by refraining from tilting the camera, which is usually
only possible if the photographer is at an elevated position. And we all know that this ideal state is rarely reached.

The shift function is probably the more comfortable method for photographing dead straight buildings,
because by shifting the lens, the threatening perspective distortions can be avoided.
If you point your camera straight at a high building so that all vertical lines are displayed without distortion, and then shift upwards,
the image section is shifted in such a way that the building is displayed completely within the image section without having to tilt the camera upwards.
Correcting collapsing lines is easy in post-production, but it takes practice and, most importantly,
foresight when shooting. By correcting converging lines afterwards, the photo may lose some of the image
information that was important to you and that was beneficial to the effect of the image.
For this reason I can only recommend again and again to take pictures with a little more air to the edges of the picture.
Cutting away is in the least cases the problem. So remember already during the composition of the picture: "Better have than need!
Another reason against the subsequent vertical equalization in excessive practice is the resulting reduced image quality,
which can affect the sharpness and brilliance of your photo.

The tilt effect
Photos or videos that are especially characterized by large, blurred areas and that show the motifs as in a kind of miniature
landscape are most likely created with a tilt/shift lens.
The tilt effect is more of a peripheral phenomenon of this lens and does not correspond to its main function,
which brings us to the experimental part of this report.
The so-called tilting, i.e. panning, is based on Scheimpflug's rule, developed by Theodor Scheimpflug,
who dedicated a large part of his life to creating maps with the help of photographs he took from his balloon.
In most cases it was impossible to avoid tilting the camera, which caused parts of the photo to become blurred,
which was not at all beneficial to the creation of maps.
However, the wise Mr. Scheimpflug found out through countless experiments
that a photo is completely in focus when he changes the parallel of the image, lens and focus plane by tilting the lens.
His discovery states that for a continuously sharp photograph, the image, lens and focal plane must be on a common straight line.
For an effective tilt effect, however, Mr. Scheimpflug's approach is completely the opposite,
changing the planes of focus by using a tilt/shift lens in such a way that several blurred planes create the fascinating miniature effect.
To achieve precise results, I generally work on a tripod, but as always in life, practice makes perfect,
so that the SAMYANG Tilt/Shift 24mm F3.5 ED AS UMC can also be successfully operated freehand.
Of course, the lens can also be used as a manual wide-angle lens without any adjustment.
Tilting and shifting can be done independently of each other, as the corresponding levers are located on superimposed rings and can be operated separately.
This is a major advantage that opens up further creative possibilities, as the lens can be shifted up and tilted to the side at the same time.


The lens - scope of delivery and equipment
The SAMYANG Tilt/Shift 24mm F3.5 ED AS UMC comes in a black, synthetic velvet lens pouch and
comes with the necessary protective cap for the lens and connection thread. A lens hood is not included.
With the largest possible aperture setting of f/3.5 and an ideal focal length of 24mm, which covers a large part of
my desired motifs and, as experience shows, neither forces me to take a long distance to the subject nor to move very close to it.
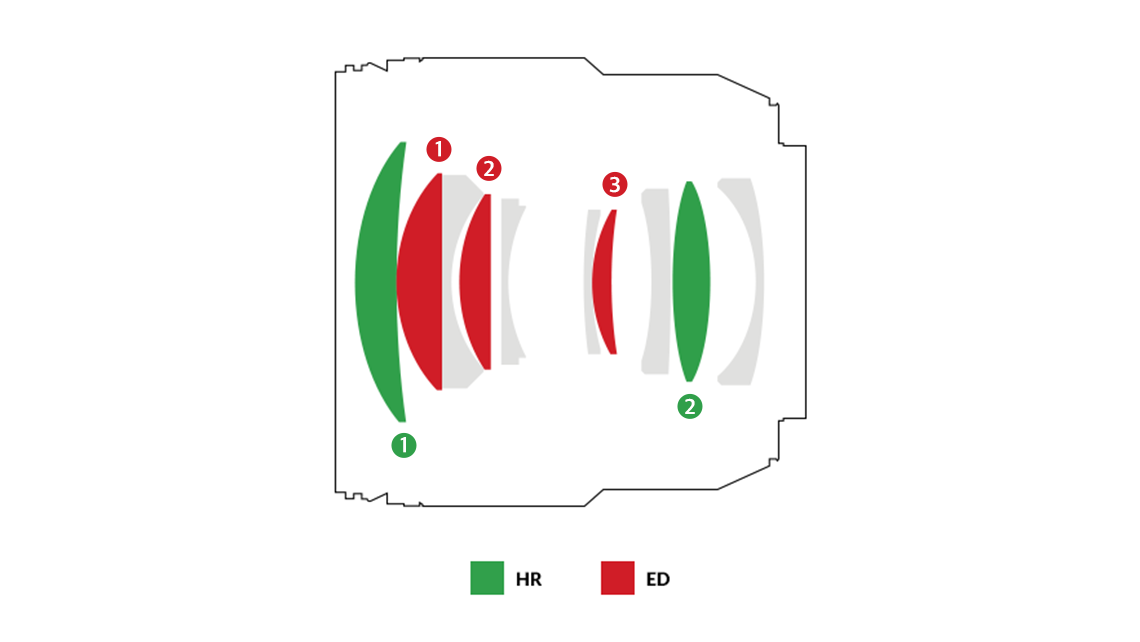
The optical construction was made with 16 coated glass elements,
which among other things consist of two aspherically ground lenses and two ED-lenses,
which guarantee a low-error imaging performance due to a particularly even dispersion of all light colours.
Shifting allows an adjustment range of 12mm in any direction. The lens can be tilted by up to 8.5 degrees.
A changeover for many photographers is the lack of autofocus,
which is generally not found in any tilt/shift lens on the market.
Because of the well thought-out settings, which have to be adjusted before every shot and take a lot of time,
I don't miss the autofocus, seen from a comfortable point of view.
The focus adjustment is probably the least work step when using a tilt/shift lens.
The aperture cannot be controlled by the camera, but is set directly on the aperture ring.
The aperture value is not transmitted to the camera.

● Full format lens
● 24mm fixed focal length
● Especially suitable for architecture and landscape photography
● High-quality optics consisting of 16 tempered glass elements for a convincing sharpness of detail
● UMC anti-reflective coating for the reproduction of high contrasts and natural colours
● Available for Canon EF, Canon M, Nikon F, Pentax K, Sony A, Sony E, MFT, Samsung NX and Fujifilm X
● Dimensions: 8.59 x 8.59 x 11.29 cm
● Weight: 0,7 kg
● Largest aperture: f/3.5
● Filter diameter 82 mm
● The image quality
The field of application of the SAMYANG Tilt-/Shift 24mm F3.5 ED AS UMC is mainly in architectural photography,
so that good imaging performance is necessary to deliver a high level of image quality. The depicted subjects,
in this case the verticals of the photographed buildings, should be reproduced as undistorted and sharp as possible.
For a structured overview of the imaging performance of the lens,
I will shoot two test series consisting of an unadjusted row and a shifted row.
I will shoot the photos without shifting with a Sony SEL FE 24-105mm F4.0 G OSS to compare the image quality better.
All shots will be shot with a Sony a7r IV in RAW format, processed in Adobe Lightroom and assembled in Adobe Photoshop for the planned test series.
Since the imaging performance of a lens varies in the center and the edges of the image in many cases,
which is related to the aperture setting used, among other things, I will arrange the test series with sections of the center
and the upper right corner and shoot with different aperture settings from the open aperture to the maximum closed aperture.
Already in picture 2 the coated quality of this lens becomes noticeable surprisingly fast.
Many cheap tilt/shift lenses show their qualitative deficits quite quickly in the form of barrel-shaped distortions of the vertical and horizontal.
They compensate the falling lines without any problems, but in return they produce unpleasant distortions that don't really make the photo
more beautiful and are difficult to correct in post-processing.


To take picture 2 I shifted the SAMYANG Tilt-/Shift 24mm F3.5 ED AS UMC up to the stop to see possible image errors more clearly
but even at the stop the lens shows no distortion in the vertical beams of the building.
For pictures 3 to 5 I was mainly interested in the imaging performance of sharpness and details of the tilt/shift lens.
Many wide-angle lenses produce so-called edge blur at the edges of the image, i.e. blurred areas that increase towards the edge of the image.
The reason for this is the sometimes very strong lens curvature or inferior workmanship.
In addition, especially when photographing with open aperture, disturbing chromatic aberrations, i.e. colored edges, can occur.
To my surprise, this tilt/shift lens does not show any aberrations even at an open aperture of f/4.0 and even a marginal blur that I expected is only minimally visible.
At 24mm, the lens moves at the outermost edge of the wide-angle range, but experience shows that this does not exclude blurred edges.
Conclusion
Ambitious architectural photographers will prefer precise photography on location to the subsequent rectification of falling lines in their daily work.
The price of the lens is around 730.00 €, far below the recommended prices of other lens manufacturers,
whose cheapest tilt/shift lenses start at around 1000.00 €. The minimal edge blurring that occurs is therefore quite tolerable.
The price/performance ratio of this bargain is within a healthy range,
so that the SAMYANG Tilt/Shift 24mm F3.5 ED AS UMC has found a firm place in my camera backpack.
My thanks go to SAMYANG and Foto Walser for providing me with this lens!
RELATED PRODUCT